Eduroam – Connect Linux
Any version of Linux that uses the “NetworkManager” application should be very similar.
There are two main steps to complete:
Import the University’s Net CA Certificate
- Connect to the Bristol-WiFi-Setup wireless network by choosing it from the list of available networks.
- Open the Applications Menu » ‘Accessories’ and then click ‘Terminal’
- Type exactly [or copy and paste] the single line below in to the Terminal window:sudo mkdir -p /etc/ssl/certs && sudo wget -nv --output-document=/etc/ssl/certs/UoB-Net-CA.pem https://www.wireless.bris.ac.uk/certs/eaproot/uob-net-ca.pemEnter your linux password when prompted. This step imports the University’s Net CA certificate to your computer.
Configure wireless settings
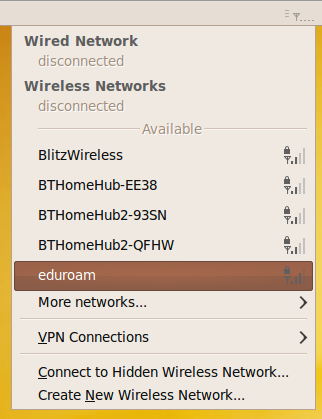
- Click on the Network Manager icon on the top right of your screen, and choose eduroam from the list of available networks.
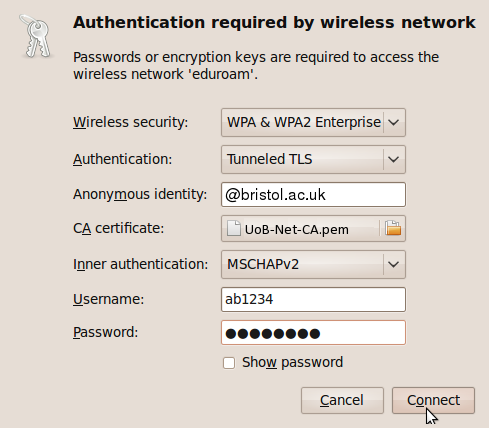
- In the ‘Authentication required by wireless network’ box, enter the following settings:
- Wireless Security: WPA & WPA2 Enterprise
- Authentication: Tunnelled TLS
- Anonymous Identity: nobody@bristol.ac.uk
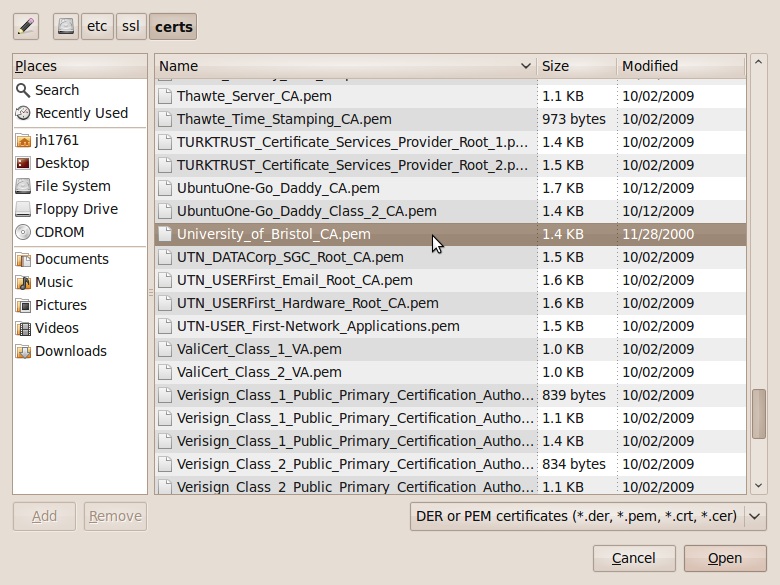
- CA Certificate: ‘File System’ -> etc -> ssl -> certs -> UoB-Net-CA.pem
- Inner Authentication: MSCHAPv2
- Username: Your Bristol username, e.g. ab12345
- Password: Your Bristol password
Please note: in Ubuntu 20.04 there is an additional category called ‘Domain‘. This should be left blank.
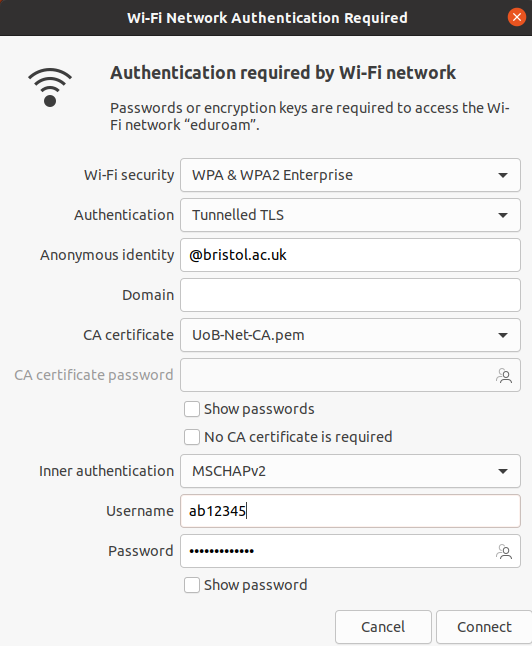
3. Click connect
Using eduroam in the future
To use eduroam in the future, just click the ‘Network icon’ and select ‘eduroam’ from the list of available wireless networks. The connection will start automatically, and then you should be able to access the internet.
